Saturday 30 May 2015

3ds max tutorial - introduction material properties


 UNDERSTAND MATERIAL PROPERTIES IN 3D STUDIO MAX 


Hi friends.....

                        In 3D studio max, before start to learn about different type of material. We must know about its properties.when we create some natural and real rendering generally its all about lights and assign material. In architectural or interior scene. We need always assign material to clothes, body parts, liquid like as water, wine, dirty water etc.just as material in real life can be described as scaly, soft, smooth,opaque,or blue material applied to objects can mimic properties such as color, texture, transparency, shininess and so on in this tutorial i learn you the basic of working with the material and all the features of its properties. In 3d studio max there is most important part of material properties. So, let's begin and start to know about material properties.


COLORS OF OBJECTS

In basic, color is the simplest material property and the easiest to identify on any objects, however unlike the objects color defined in the create and modify panel, there is not a single color swatch that controls an objects color. Consider a box of white balls. when you shine a bright blue spotlight on them, all the balls turn blue. Because the blue highlights from the light mix with the white surface so, even if the balls are assigned a white material, the final color of the image might be very different because the light makes the color change. It means the light color may change the material color which is assign to the object.


OPACITY

First we know that opaque objects are objects that you can not see though. Such as house or stone etc. and a second side ,are objects you can see through such as water, plastic, glass etc. 3ds max material a several control for adjusting this properties of opaque. Including opacity and several transparency controls.

Opacity is the amount that an object refuse to allow light to pass through it. It is the opposite of transparency and its typically measured as a percentage. An object is 0 percentage opacity is the completely transparent and an object is 100 percent opacity is like such as a solid. Which is not trans parable.

Yes, Transparency is the amount of light that is allowed to pass through an object. Because this is the opposite of opacity.transparency can be defined by the opacity value. 3ds studio max give us several option enable you to control transparency. Including fall of, amount and type.etc.


REFLECTION

A reflection mean is what you can see when  you look in the mirror. Shiny objects reflect there surrounding.different objects reflect different type. Some objects reflect low such as copper, brass, iron etc and some objects reflection properties is high such as stain less steel, glass, ice etc.here we also control reflection amount for high or low reflection.

REFRACTION

The amount of reflection that a material produces is expressed as a value called the index of refraction is the amount of light bends as it goes through the transparent objects. The default index of refraction value is 1.0. (which is fully in solid form) Different type of object may different type of index value or amount. Such as water, wine,ice, glass etc.


SPECULAR  HIGHLIGHT

Shiny objects, such as polished metal, chrome, water, tiles etc types of objects. Include highlights where the lights reflect off their surfaces. These highlights are called speculate highlights and are determined by its settings. These settings include its level,glossiness and soften value.

Its level settings for the setting for the intensity of the highlight. The glossiness determines the size of the highlight. Higher glossiness value result in a smaller highlights and the soften value thins the highlights by lowering its intensity and increasing its size.


SHININESS

A glossy objects has shininess these object include such type of metals, stainless steel, plastic, glass, copper, brass etc. and a rough object has no shininess and it is opposite properties of shininess, object include rough stone, wall,brick etc.

There is other also properties of objects diffuse color, ambient color, its texture sharpness or softness etc.


Enjoy tutorial :)


Friday 29 May 2015

3ds max tutorial - Making a 3D company logo


3DS MAX- MAKING A 3D COMPANY LOGO

Hiiiiiii friends,

Of course, 
One of the early uses for 3Ds max was to create or animate corporate logo, and although max can still do this without any problem. It now has capabilities far beyond those available in the early day. The shape tool can even be used to design the logo.


                     In this example, we design and create a simple logo using the shape tools for the company named 'surya energy limited'
we animate this name in sky with revolution to the earth.


Start with using the shape tools to design and create company logo,

Follow this steps:
1.First i start this tutorial, making the earth with standard primitives>sphere
Change the sphere parameter with appropriate value.
(Make sure it must increase the segment value of sphere for smooth curve)

2.Create a company name by clicking the text button and dragging in the front view to create a text. Change the parameters for this text for looking good (play with  parameter value for good result). There is different type parameter like text style, text size, kerning, leading and simply bold, italic, underline. u can also justify the alignment the text right, left or center

3. Now i assign the material to the earth and text, i simply going to material editor, with press 'M' and assign a empty slot and give  a high resolution bitmap image of earth to sphere and give some glossy light orange color to the text.

4. I have to change environment of the scene from black to dark blue color like as space.click on RENDER > environment > background > change the environment map. I put here high resolution space image.

 Next step is put light for a space scene


Click on lights from command panel and choose omni light from standard light and change its intensity as need. You can also put here two or three different light has different parameter.

I also use here different type of lights effect like as streak and volume. (I discuss this topic in details in my next blog )

Now. Its time for bend my text for revolution to earth. I use simply BEND modifier from modifier list and in parameter change the angle 180 degree (You can change angle as per your need ) and give it simple rotate animation.

Now i render the scene and do O.K. with change the parameters and value.
RENDER SCENE-1


 RENDER SCENE-2

Enjoy the tutorial :)


Thursday 21 May 2015

3ds max P bomb tutorial-Explode an object


HOW TO CREATE P BOMB IN 
3D STUDIO MAX ?


Hiii friends,

Today i learn you 'P bomb' tutorial....'P bomb' is the best tool for deform and destroy. Which can easily destroy any type of geometry or mesh objects.

First,i create the plane object and background. I want a space scene, so in environment tab i put the JPEG image of space with high resolution. Create a sphere like as earth and i simply go to
CONTROL PANEL>FORCES>P-BOMB and put it near sphere.


Here PBOMB place is important for types of deform object which may be near, far or center the sphere. If PBOMB place is center of sphere it mean sphere deform from center of sphere.

Now i must attach the PBOMB to sphere for its effect. So i use the tool 'BIND TO SPACE WRAP'


Which can see in above image. Select sphere and pick BIND TO SPACE WRAP.and dont click, only move cursor on sphere you can see the special sign for attach.  Click on its and drag to sphere. after it sphere is blinking automatically for a second it mean Process is complete.now select the PBOMB and click on modifier for change its parameter for real effect of blast.

I use bellow setting for my tutorial.


P BOMB setting


Here i simply rendering the scene....looking like as the earth in the space.
Drag the frame key and watch the explosion of sky.....:)


Once you get an explosive effect you like, you  can  return  to  the  setting  and play with its parameter and enjoy the destroy.

NOTE: This render include also star light effect , cyl gizmo effect and volume light....

Enjoy tutorial :)

Friday 1 May 2015

3ds max- metnal ray caustic tutorial

HOW TO CREATE CAUSTIC LIGHTS USING MENTAL RAY IN 3D STUDIO MAX ?


Caustic is the term of light patterns caused by light refracting through a glass object. For example,  take a clear glass of water and set it out in the sunlight. the bright streaks and patterns you see is the caustic.


Well, Beginning with the 3ds max, the mental ray renderer is integrated with the program. Unlike the default scanline renderer. mental ray can calculate photons to create global illumination (GI ) and caustic lighting.Which is useful for create caustic ray.


      This tutorial mainly focuses on refractive caustics caused by light going through object like as original scene. There is also reflective caused light bouncing off of shiny things. Both are set up in the same way.

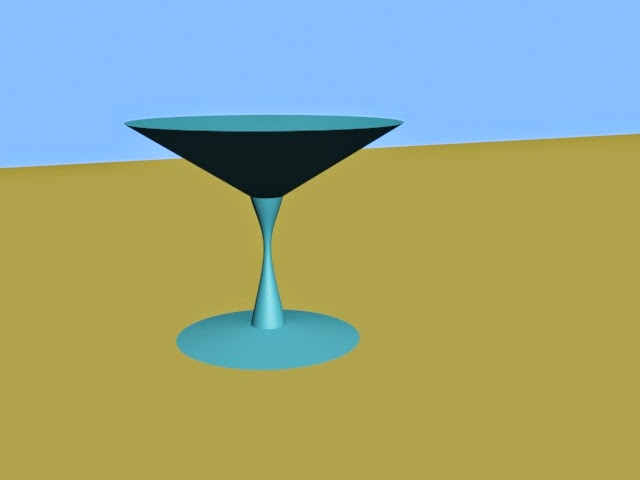
We will start by making the scene that will create caustic. Here i used the wine glass model from used lathe modifier on the simple plane.


Right now, the scene is simple looking like this.


First of all wineglass is not yet wineglass. To use this photons effects. We need to create a new raytrace material that's pretty simple.


First i hit F9 for render and see basic view of my scene without caustic.


                         Wine glass without caustic effect

For other scene you should probably adjust the reflect box for reflection, and play around with the speculer highlights. Since this scene is just demonstrate the technique. I just made it more transparent for real glass. ( Transparent and reflect effect must have for caustic. you can also use physics_phen, raytrace etc.)


Well, It is glass but not much else. now we will make the caustic generators. 

First, we need to change the renderer to mental ray (of course). the default scanline renderer cant do photons.


Now we need to makes light that can emits photons. Go to create --light--MR area light, and drag in the proper angle toward the wine glass.it will render just like this.(shadow-Ray traced shadow )
Well, I made caustic but it could be better. For example light is pretty dim. But we can make it brighter. Go into the indirect illumination tab of the render menu again. Scroll to the bottom and find global light properties.


We can simply crank the energy field for good and smooth result  but at the cost of render time. Which can be 1 or 2 lacs value.

Hit F9 for render the scene.


Enjoy tutorial. :)