Showing posts with label mentalray. Show all posts

Sunday, 7 June 2015

3ds max tutorial- create realistic water using mental ray ocean shader


CREATE REALISTIC WATER USING MR OCEAN SHADER


Hi friends,

Today i learn you create water from using mental ray ocean shader in 3ds max.


                                Many times we need some realistic effect in our scene. Water effect among one of those. Water effect is generally use in like ocean, lake, pond, swimming pool etc.3d studio max provide us simply this type of effect using mental ray engine and i illuminate this by simple sunlight. well. This pretty shader has many settings but i make it simple by telling you every one.Now, I am going to create a image of an ocean which is illuminate by natural sunlight.

First of all, 3ds max default using renderer is scanline render so, i have to change scanline to mental ray first.

MODELLING AND SET CAMERA


After change the renderer. for water surface i create a plane in proper size and for some naughty effect i also add sphere geometry (ball) in the sea. Now i set a target camera. and set its target parallel to the surface but give some angle for realistic effect. Like a man see an ocean surface.now my all modeling is ready. Its time to give it material and lights.

MENTAL RAY MATERIAL


In menu bar click on RENDERING or hit M for call up the material editor. At the top right side click on STANDARD material in standard material first material is Arch & Design(mr) click on it as per image bellow. 

ARCH AND DESIGN MATERIAL

In main material parameter, set>> Diffuse level -0.50 and sky color RGB-0.314, 0.592, 0.902reflectivity set white color>> Refrection color set to RGB-0.651, 0.792, 0.965
>> Roll out and drop down parameter to SPECIAL PURPOSE MAP and set BUMP value 0.30 and set displacement value 0.50. near BUMP value click on NONE for open material/map browser and select Ocean (lume) map. (Image shown bellow)

OCEAN (LUME) MAP

Set value for OCEAN (LUME) MAP
(all value are in feet)


Largest      : 50.0smallest     :6.0quantity     :7steepness   :1relative to world- yesrelative to object-yeswave speed:0.35size            :1.0"variation    :1


Here, this is for only still image you can also animate waves form clicking on loop animation and cal also change the value of the other parameter like smallest, largest, steepness value.
Now i simple create sunlight from COMMAND PANEL > SYSTEM > SUNLIGHT

Give it some sky blue color from sunlight parameter and set intensity proper. Sunlight angle set mid on sky as real mid noon for great sunlight.

and finally change the background environment  by clicking on Menu bar > Rendering > environment  > environment map. and select map for background.

RENDER SCENE

Enjoy tutorial :)


NOTE : This scene also include lens effect which i learn you in my next blog.


Friday, 1 May 2015

3ds max- metnal ray caustic tutorial

HOW TO CREATE CAUSTIC LIGHTS USING MENTAL RAY IN 3D STUDIO MAX ?


Caustic is the term of light patterns caused by light refracting through a glass object. For example,  take a clear glass of water and set it out in the sunlight. the bright streaks and patterns you see is the caustic.


Well, Beginning with the 3ds max, the mental ray renderer is integrated with the program. Unlike the default scanline renderer. mental ray can calculate photons to create global illumination (GI ) and caustic lighting.Which is useful for create caustic ray.


      This tutorial mainly focuses on refractive caustics caused by light going through object like as original scene. There is also reflective caused light bouncing off of shiny things. Both are set up in the same way.

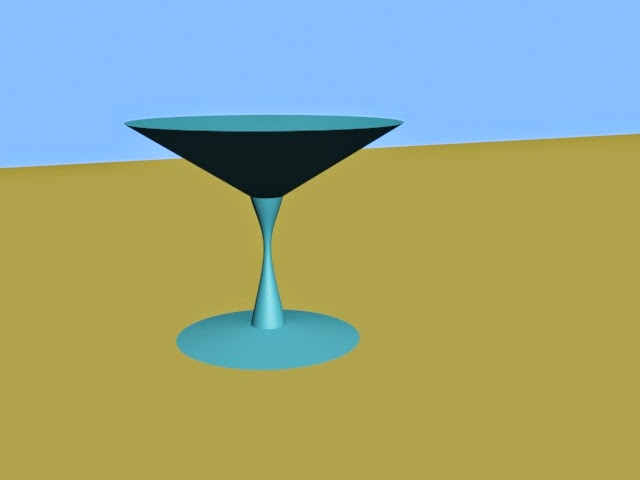
We will start by making the scene that will create caustic. Here i used the wine glass model from used lathe modifier on the simple plane.


Right now, the scene is simple looking like this.


First of all wineglass is not yet wineglass. To use this photons effects. We need to create a new raytrace material that's pretty simple.


First i hit F9 for render and see basic view of my scene without caustic.


                         Wine glass without caustic effect

For other scene you should probably adjust the reflect box for reflection, and play around with the speculer highlights. Since this scene is just demonstrate the technique. I just made it more transparent for real glass. ( Transparent and reflect effect must have for caustic. you can also use physics_phen, raytrace etc.)


Well, It is glass but not much else. now we will make the caustic generators. 

First, we need to change the renderer to mental ray (of course). the default scanline renderer cant do photons.


Now we need to makes light that can emits photons. Go to create --light--MR area light, and drag in the proper angle toward the wine glass.it will render just like this.(shadow-Ray traced shadow )
Well, I made caustic but it could be better. For example light is pretty dim. But we can make it brighter. Go into the indirect illumination tab of the render menu again. Scroll to the bottom and find global light properties.


We can simply crank the energy field for good and smooth result  but at the cost of render time. Which can be 1 or 2 lacs value.

Hit F9 for render the scene.


Enjoy tutorial. :)